¶ Download
https://bitbucket.org/malhan-designs/x301-mods/src/master/XY Brackets - Composite/
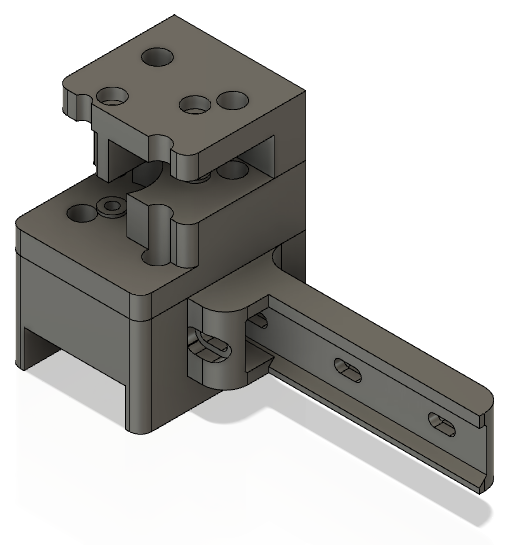
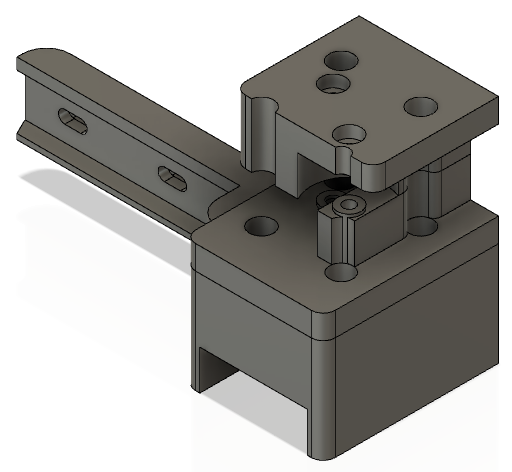
These XY Brackets replace the 3 piece design of the main XY motion brackets with a single piece design that is more rigid. Recommend using the 25mm variant of the Y Rail Homing Spacer Block with these.
Derived from:
- https://bitbucket.org/makersmashup/x301-models/src/master/Fusion/XY Bracket Bottoms V2.f3d
- https://bitbucket.org/makersmashup/x301-models/src/master/Fusion/XY Bracket Top Smooth.f3z
- https://bitbucket.org/makersmashup/x301-models/src/master/Fusion/XY Bracket Top Teeth.f3z
¶ Additional parts
- 4x M3 x 40mm socket head cap screws - to hold pulleys in place (was M5 x 40mm)
- 4x M3 nuts
- 8x M3 x 20mm socket head cap screws - for bracket to linear rail block connection (was M3 x 8mm)
¶ Changes from Original Design
- 1 piece design that is much more rigid and takes assembly pressure off the screws for the pulleys. This allows the screws to be tightened to the correct pressure for the pulley bearings.
- The brackets are shallower on the Y-axis, allowing more travel forward. They are slightly wider on the X-axis, reducing travel theoretically. If you are using the slim carriage belt mount, the X-axis travel is already limited by the cooling fan so the reduction in actual travel should be null.
- Allows 4 screw connection for bracket to linear rail block connection.
- Uses printed 5mm to 3mm spacer cylinder in pulleys to allow use of 3mm cap screws for pulleys, giving clearance for additional rail block connections
¶ Printing Notes
- Print 1x each of the Left / Right Bracket STLs
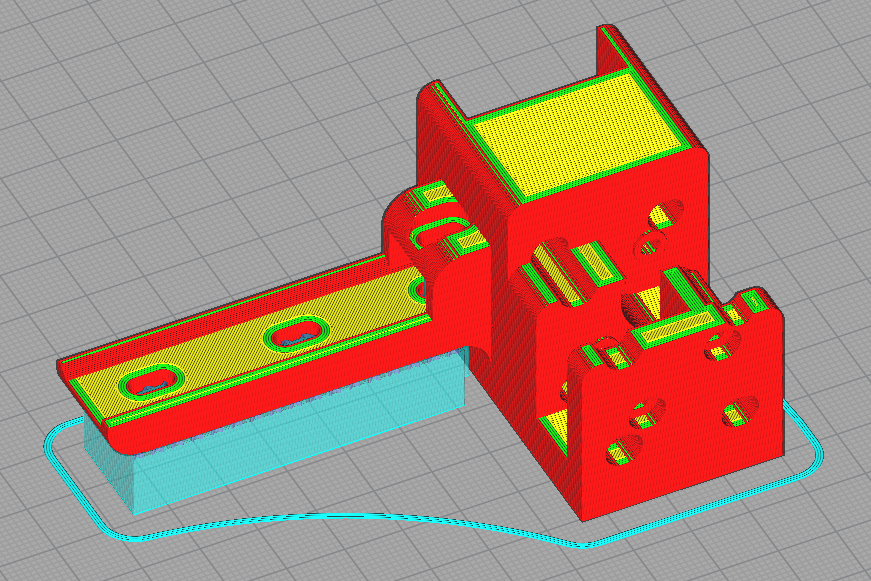
- The brackets should be oriented so they are laying on their back when printing. I have removed all fillets from the backs to reduce the likelihood of warpage.
- Brackets should be printed with supports, with a placement of "touching buildplate". This is just to support the long arm that connects to the linear rail. I like to print these at a .16 line height to get a bit more resolution on the fine details in these models.
- Print 4x of the pulley spacers
- 2 versions of the pulley spacers have been supplied. One is exactly 3mm to 5mm, another is .1mm oversized on the outer diameter. I had to print the .1 oversized version on my printer to get a tight fit on both the M3 screw and the inside of the pulleys. It is important that it is a tight fit on both sides so the pulley's bearings are spinning instead of the printed part. Try playing with your horizontal expansion to get this dialed in, the spacers are a quick print so just print 1 at a time until you get it right.
¶ Example Images


¶ Example of orientation in slicer:
